Modifying the colours of the interface

 Download PDF

Modifying the colours of the interface

The “negative colours” option

This accessibility feature allows you to switch the display to negative (inverted colours) on the screen of any application.

The “negative colours” feature can be activated through the Vision menu in Accessibility settings.

Application/Settings/Accessibility/Vision/Negative colours

The negative colours work on all screens: home screen, lock screen, as well as applications bought from the Google Play Store.

“Grayscale” option

This accessibility feature allows you to modify the colours in shades of light gray or white on the screen of any application.

The “grayscale” feature can be activated though the Vision menu in Accessibility settings.

Application/Settings/Accessibility/Vision/Grayscale

By using the two settings “negative colours” and “grayscale,” you can get very dark shades of gray to clearer shades on the screen with any application.

In order to improve readability, it is possible to improve the intensity of the contrast with the brightness feature.

Application/Settings/Display/Brightness

On Samsung devices since 2015.

Inverting the colours of the interface

 Download PDF

Inverting the colours of the interface

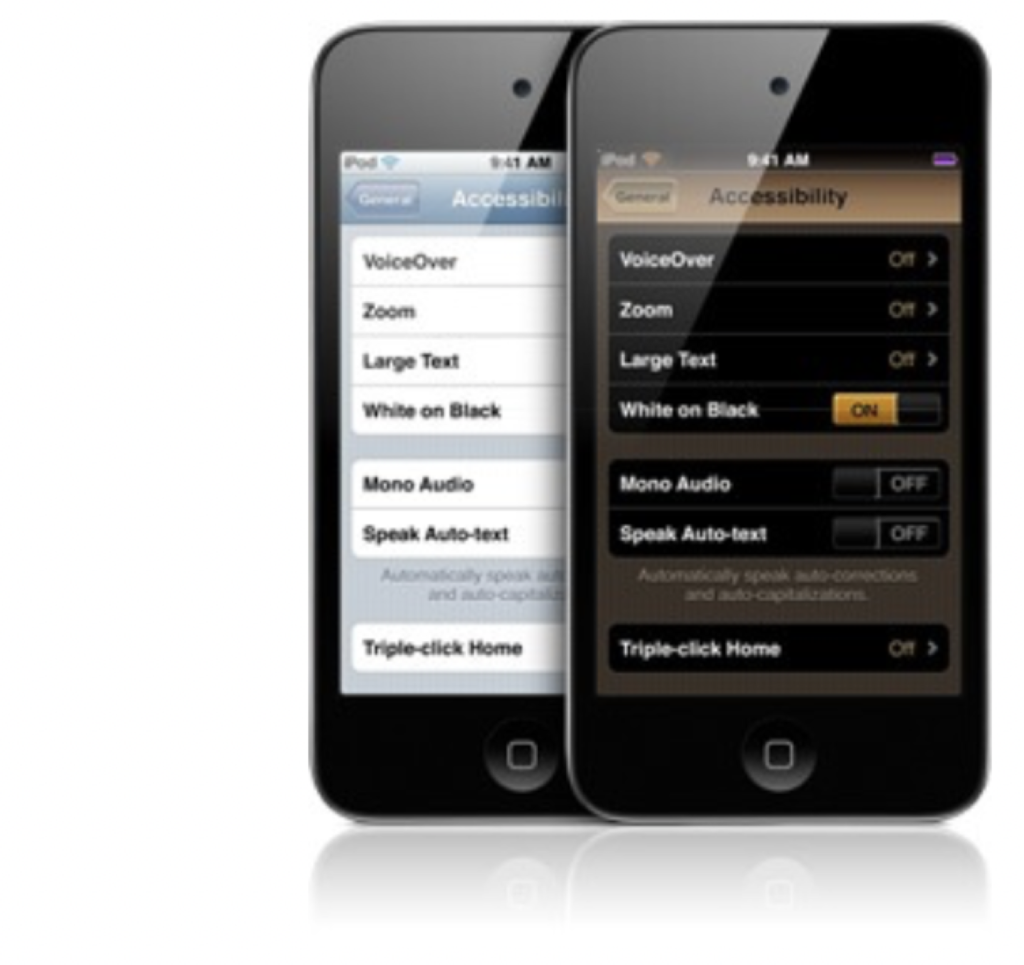
“Invert colours” option

This accessibility feature allows you to toggle the display in negative colours for any application.

The “invert colours” feature can be activated through the accessibility menu from the Settings application.

Settings/General/Accessibility/Invert colours

Inverting colours work on all screens: Home screen, lock screen, Spotlight, and applications bought from the App Store.

Since iOS 6, this feature works perfectly with VoiceOver.

To improve readability, you can modify the intensity of the contrast through the Brightness setting.

Brightness Settings and Wallpaper

For iOS 8, the feature to invert colours will have additional display accommodations such as grayscale or inverted grayscale.

This will allow you to display the screen without colour, and to help certain people with visual impairment feel more comfortable.

Navigation Gestures with ZOOM

 Download PDF

Navigation Gestures with ZOOM

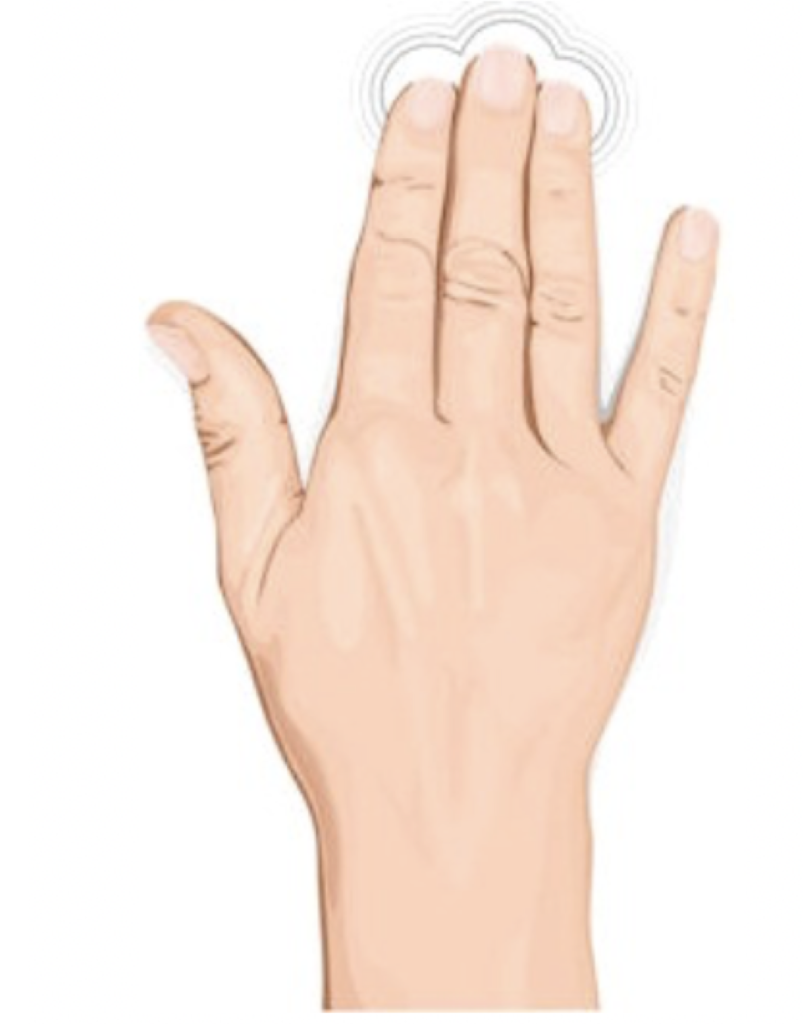
To begin, here is a small lexicon of important gestures:

  • Touch once with and leaving three fingers and hold Action of touching the screen your finger against it.
  • Touch twice with quickly twice and three fingers Action of touching the screen quickly twice and withdraw your fingers afterward.
  • Touch twice with three fingers and hold Action of touching the screen twice and leaving your finger against it on the second touch.
  • Swipe two fingers Action of quickly swiping the screen from one side to the other.

Here is a summary of gestures for Zoom:

3-finger gestures Actions
Touch once and hold Allows you to move around on the magnified page.
Touch twice Activate or deactivate the magnification.
Touch twice and hold Allows adjustment and personalization of the zoom size by moving towards the top of the screen (zoom up) or moving towards the bottom of the screen (zoom out).
2-finger gestures Actions
Swipe left/right Move from one page to the other.
1-finger gestures Actions
Swipe left/right Move from one page to the other (just like the two- finger gesture.)

Trick :
In ZOOM mode, by placing and holding one finger on one of the corners or side of the screen, the screen moves towards the chosen direction.

For iOS 8 that will be released this fall, Zoom has been entirely redesigned.

Find all of the new features of magnification on the “Utilisation de l’accessibilité ZOOM” file.

Navigation gestures with VoiceOver

 Download PDF

Navigation gestures with VoiceOver

When the first tactile smartphones arrived, we did not imagine the upheaval it could cause in our preconceived ideas about GSM adaptation.

Today, a series of gestures allow us to have access to settings and default applications from tactile Apple devices. With the help of VoiceOver, the combination of gestures and voice commands with a bit of training will allow you to conquer the beast.

To start, here is a glossary of important gestures:

Touch
Action of touching the screen quickly and lifting your finger immediately afterward.

Touch and hold
Action of touching the screen and keeping your finger on the screen.

Touch x2
Action of touching the screen two times quickly and lifting the finger immediately afterward.

Touch x2 and hold
Action of touching the screen two times and holding your finger on the screen on the second time.

Swipe
Action of sliding your finger quickly from one side of the screen to the other.

Rotor
Execute a circular movement with two fingers on the screen.

Pinching
Action of placing two fingers on the screen and bringing them closer.

Here is a list of the most common VoiceOver gestures:

1-finger gestures

Actions

Touch and hold

Speak and select the element under your finger.

Touch x2

Activate the selected element.

Touch x2 and hold

Activate the “slide/move” / “slide/delete”.

Touch x3

Double tap a button.

Swipe towards the left or right

Select the element before or after.

Swipe towards the top or bottom

Activate or move the option selected by the rotor.


2-finger gestures

Actions

Touch x1

Pause and speak again.

Touch x2

Activate a special action.

Touch x2 and hold

Allow labelling (change the name of a button in an application).

Touch x3

Open the element selector.

Swipe towards the top

Read the whole screen from the beginning.

Swipe towards the bottom

Read everything starting from the selected element.

Swipe back and forth

In some cases, it returns, cancels, or closes a pop-up.

Pinch or de-pinch

Selects or deselects.

Rotor

Select the next element or the previous element of the rotor.


3-finger gestures

Actions

Touch x1

Describe the position of the cursor and the page number.

Touch x2

Activate or deactivate the pronunciation (VoiceOver works without voice).

Touch x3

Activate or deactivate the screen (VoiceOver works with a black screen).

Swipe towards the left

Move towards the previous or next screen.  Or to the right.


4-and-5-finger gestures

Actions

Touch x1 on the top half

Select the first element in the area.

Touch x1 on the bottom half

Select the last element in the area.

Swipe towards the left or right

In the application, it moves to the next or previous application.

Swipe towards the top or bottom

Open and close the multitask panel.

Pinch

Return to the home menu.

 The rotor

The “rotor” gives access to a series of navigation settings that are modifiable.

To use the “rotor”, you must execute a gesture in two steps:

  1. Place two fingers on the center of the screen
  2. Rotate your fingers to select the desired setting

The last gesture is similar to opening the cap of a bottle.

After selecting the desired setting, it is possible to change the setting by sliding your finger vertically. (Example: To change the speed of the speech synthesis: position the “rotor” on the vocal setting, then slide one finger from the top towards the bottom to reduce the vocal speed.)

The textbox

Tap the text

During the creation of a new document or selection of text in the textbox, a virtual keyboard appears. It occupies half of the screen.

To type some text, there are two types of “input”:

  1. Standard mode
  2. Typing mode

The first mode allows you to pick the desired letter with one finger and to confirm your choice with another finger. The second mode also lets you pick the desired letter with one finger, but the selection is activated by lifting the finger from the desired letter. It is important to know that you must not lift the finger off the screen if the entire word has not been typed out, which is why there are two input modes.

To access these modes, you must place the “rotor” on the input mode.

Find the accents

To find the desired accent, place your finger on the unaccented letter and tap twice and leave your finger on the screen. This way, a table appears above the chosen letter. In this table, you will find all the possible accents related to this letter.

Insertion point

To select the location of the insertion point at the beginning or end of a textbox, complete the following gestures in two steps:

  1. Tap once on the screen area of the text to make the keyboard disappear.
  2. Once there is only the textbox, tap twice with one finger in this area.

To select the location of the insertion point in the middle of the textbox, complete the following in three steps:

  1. Tap once on the screen area of the text to make the keyboard disappear.
  2. Use the “rotor” to select the “word” function.
  3. Place your finger on the screen and execute a vertical movement with your finger to read the words of the sentence. This movement will allow you to reach the word where you want to place the cursor. The cursor will be placed in front of the selected word.

Reading of the entire document

To read the whole document: swipe two fingers from the bottom towards the top.

To read the document in a more specific way, you can pick between three different modes:

  1. Sentence by sentence
  2. Word by word
  3. Letter by letter

After selecting one of these modes, turn the “rotor.” Then, once the mode is selected, swipe towards the bottom with your finger to move from once sentence to another, one word to another, or one letter to another.

Trick

If the vocal synthesis of VoiceOver annoys you, you can tap once with two fingers anywhere on the screen. The vocal synthesis will stop.

For iOS 8, there are some new gestures for VoiceOver.

The most remarkable feature is the braille input that you can find in the “rotor.” This two-position input type (flat on the table or on the outer face of the device on its belly) displays 6 circles that represent the 6 points braille of the “Perkins” type machine on the screen. You just have to use the braille alphabet to write text, and a quick swipe with one finger from left to right to insert a space.

Using FaceTime

 Download PDF

Using FaceTime

What is FaceTime

FaceTime allows users to do video/audio calls with anyone in your contact list, as long as they have an Apple device.

How to access it

To activate FaceTime, you need to create an Apple ID. You can do this by going to this website: https://appleid.apple.com/ca/en/ . Once that is set up, go to :

Settings/FaceTime/Activate

Usage

On iPhone, FaceTime works just like a phone call. When you are searching through your contacts for someone to call, instead of selecting their telephone number to call,  select “FaceTime”.

On iPad or iPod, FaceTime is used as an application where you can manage your calls, contacts, and favourites.

Tips

The usage of the double camera on the FaceTime screen is very practical.

Simplify Answering and Ending Phone Calls

 Download PDF

Simplify Answering and Ending Phone Calls

Description

The option “/End Call” allows you to personalize and simplify the way you pick up or hang up the telephone. The setting can be done very simply and intuitively.

How to access it

Application/Settings/My Device/Accessibility/Start or End Call

How does it work

  • The Home button (the physical button on the front of the device) allows you to answer phone calls: once the option is activated, you can answer phone calls with the Home button.
  • The Power key to end phone calls: with the option activated, you can end phone calls by pressing the physical button on the right side of your device, which otherwise serves to light up or turn off the device. Rest assured, the device will not turn off if you are in a call.

Info
You can also use other applications with your voice thanks to voice commands (Alarm, Music, Camera, etc…).

Adjust the colours of the screen with COLOUR ADJUSTMENT Invert the colours of the interface with NEGATIVE COLOURS

 Download PDF

Adjust the colours of the screen with COLOUR ADJUSTMENT

Invert the colours of the interface with NEGATIVE COLOURS

Colour adjustment

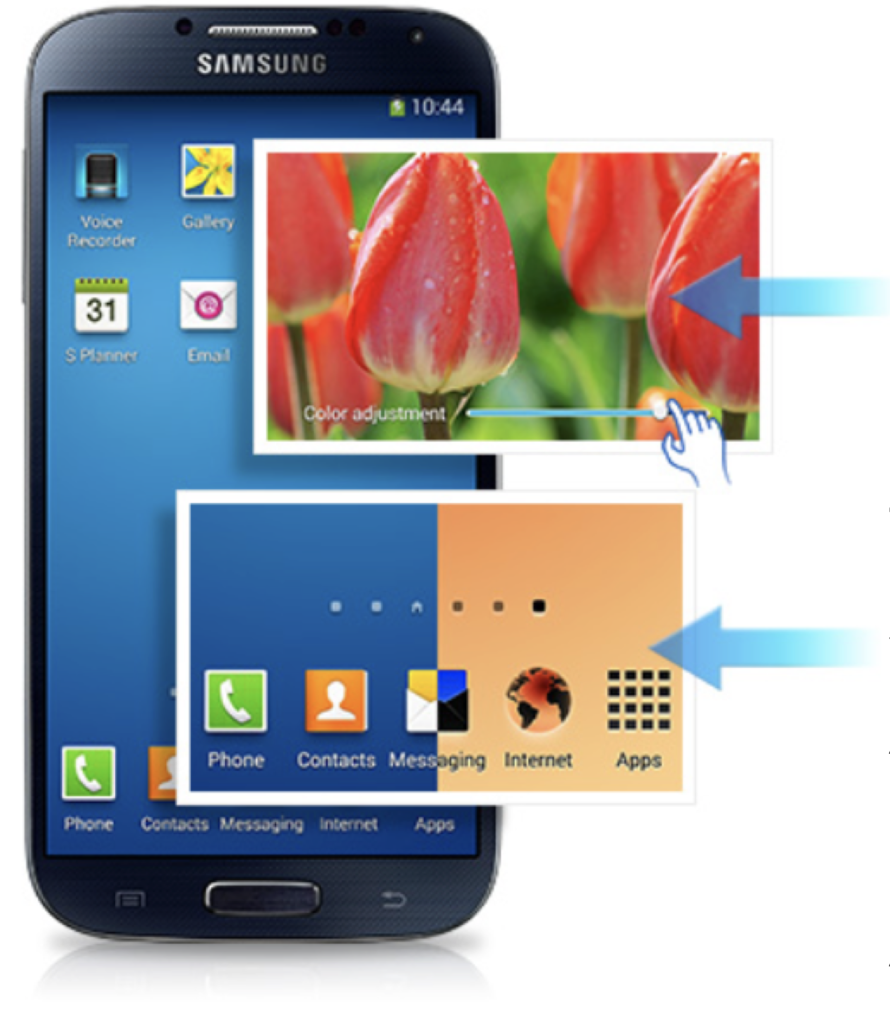
The “colour adjustment” feature allows a fine and simple adjustment of colours on the screen. It does not alter the contrasts, but it can help with people who have colour blindness, for example.

You can find this option in the accessibility settings:

Application/Settings/My Device/Accessibility/Colour Adjustment

To adjust colours, press the small checkbox next to “Colour Adjustment” to activate the option. This will allow you to adjust the colours.

Negative Colours

This is a feature that allows you to change the screen display to negative colour (or inverted colour).

To activate this feature, you have to go to the accessibility menu in the Settings application.

Application/Settings/Accessibility/Negative Colours

If you have difficulty reading the screen once the feature is activated, you can change the contrast with the brightness option.

Application/Settings/My Device/Display/Brightness

Info: Colour adjustment and negative colours cannot be activated at the same time.